Shopware#
Enhance post-purchase retention, upselling, and branding by fully integrating Karla into your Shopware store.
Install the Karla Extension#
Follow these steps to install and configure the Karla extension in your Shopware store.
1. Upload the Extension#
- Download the Karla extension from the official releases page. You will typically download the
KarlaDelivery.zipfile for the latest version. - In your Shopware admin panel, navigate to
Extensions > My extensions.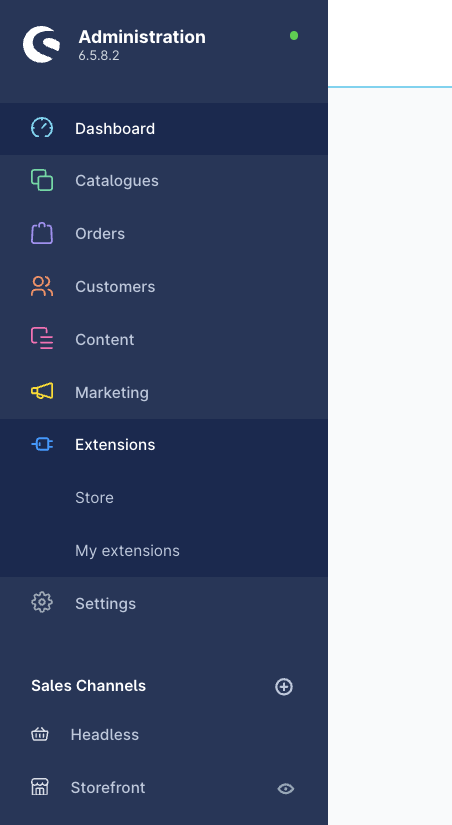
- Under
My extensions, clickUpload extension.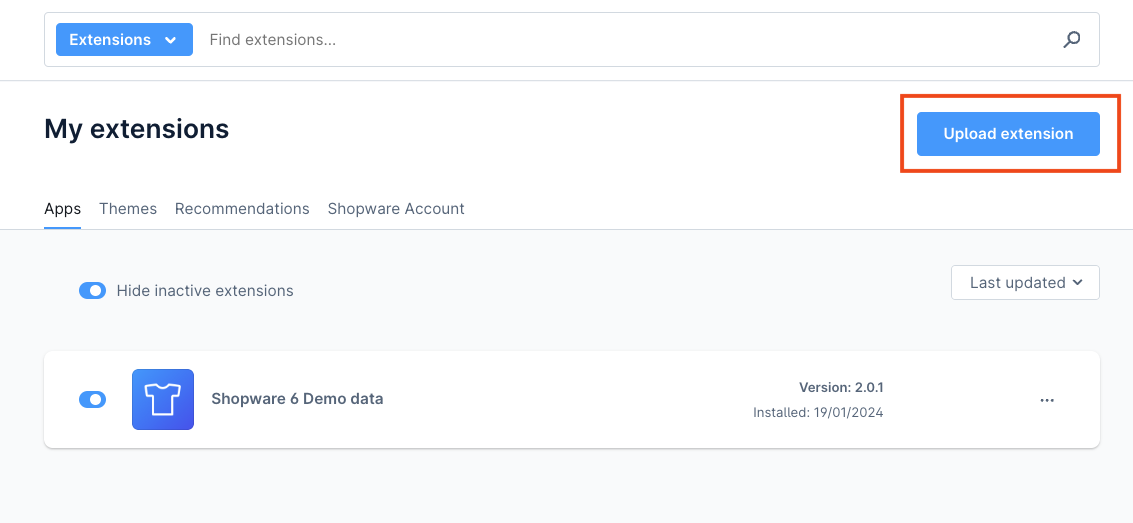
- Click
Confirmand upload theKarlaDelivery.zipfile you just downloaded.
2. Install and Activate#
- Once uploaded, click
Installnext to the Karla extension to begin the installation process.
- A success message will confirm the successful installation.
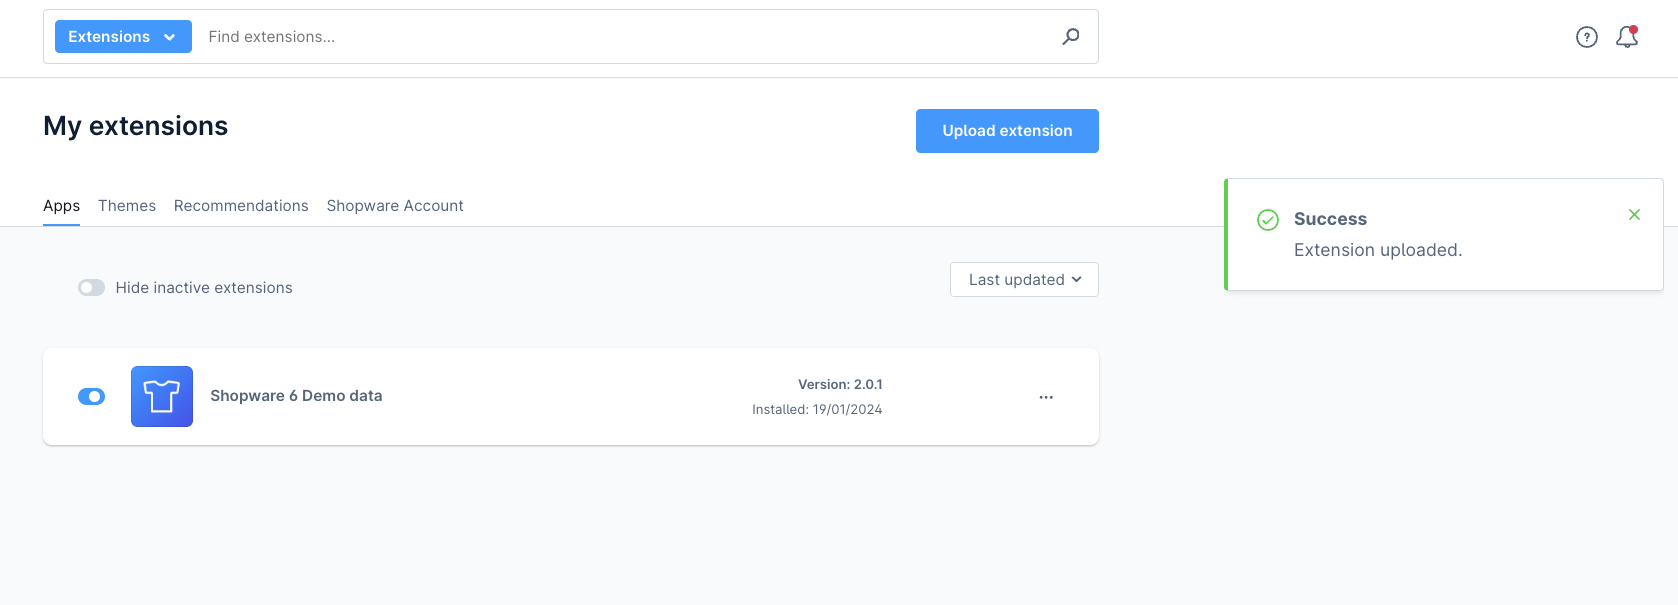
- After refreshing the page, the Karla app will show as activated. Click
Configureto proceed with merchant-specific settings.
3. Configure the Extension#
- Enter your shop slug and API key.
- Optionally, you can define a custom target API URL for advanced setups.
- Under
Shop events, select which events trigger data synchronization with Karla. - Click
Saveto apply your changes.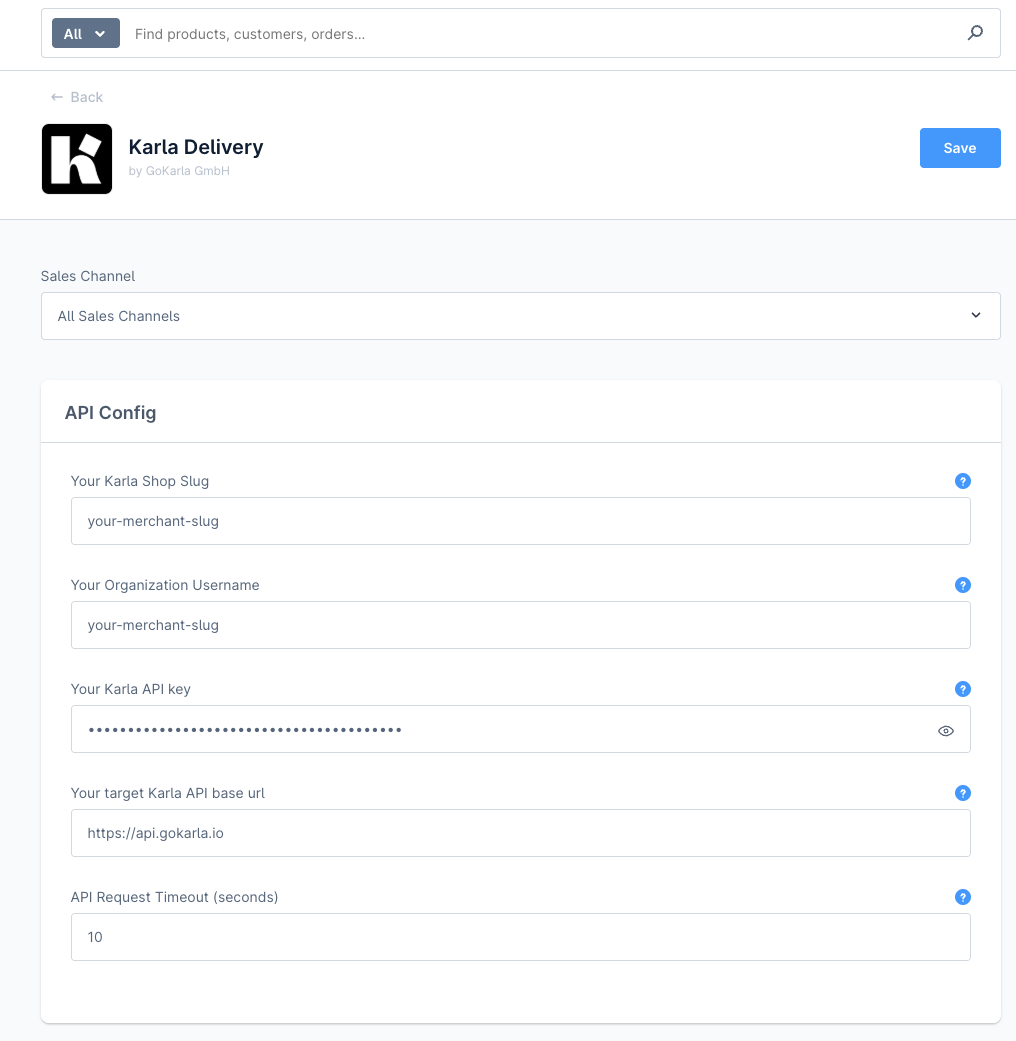
Now your shop is fully integrated with Karla!
How it works#
The Karla extension automatically synchronizes orders, shipments, and attribution data from your Shopware store to Karla.
Order attribution#
The extension tracks order attribution through Shopware's built-in affiliate and campaign tracking system. This allows you to measure the effectiveness of your tracking pages, deals, and other marketing campaigns.
When a customer clicks a link from Karla (e.g., from a tracking page or deal), the link includes attribution parameters:
https://your-shop.com?affiliateCode=karla&campaignCode=tracking_pageShopware stores these parameters in the customer's session and associates them with any orders placed during that session. The attribution data is then automatically synchronized to Karla through the extension.
Attribution parameters:
- affiliateCode: Identifies Karla as the traffic source (typically set to
karla) - campaignCode: Identifies the specific source within Karla (e.g.,
tracking_page,deals, or a specific campaign UUID)
Key behavior:
- Last-click attribution: If a customer clicks multiple affiliate links, the most recent attribution is saved
- Session persistence: Attribution data persists across page loads and browsing sessions
- Automatic synchronization: Attribution is automatically included in order data sent to Karla
No additional configuration is required for attribution tracking. The extension handles this automatically once installed and activated.
Order segments#
The extension automatically derives segments from several Shopware entities on every order and sends them to Karla, where you can target them in campaigns, triggers, and A/B tests. No configuration is required in the Karla extension — segments are emitted automatically based on your existing Shopware setup.
Sources and prefixes
Each Shopware source maps to a prefixed segment in Karla, so different attributes never collide:
| Source | Karla segment prefix | Example |
|---|---|---|
| Customer tags | Shopware.tag. | Shopware.tag.vip-customer |
| Order tags | Shopware.tag. | Shopware.tag.bought-starter |
| Customer group | Shopware.customer_group. | Shopware.customer_group.B2B |
| Sales channel | Shopware.sales_channel. | Shopware.sales_channel.Storefront DE |
An order can carry multiple segments at once — for example: ["Shopware.tag.vip-customer", "Shopware.customer_group.B2B", "Shopware.sales_channel.Storefront DE"].
Driving segments dynamically
Since the extension captures both customer and order tags, you can use Shopware's Flow Builder to stamp tags based on rules — for example, tag the order when the customer is in a VIP group, when the order total exceeds a threshold, or when a specific product is purchased. Karla picks the tag up the next time the order syncs.
Where to configure each source in Shopware
- Customer groups — Settings → Customer groups (Shopware docs)
- Customer and order tags — Settings → Shop → Tags
- Sales channels — Settings → Sales channel
Configuration#
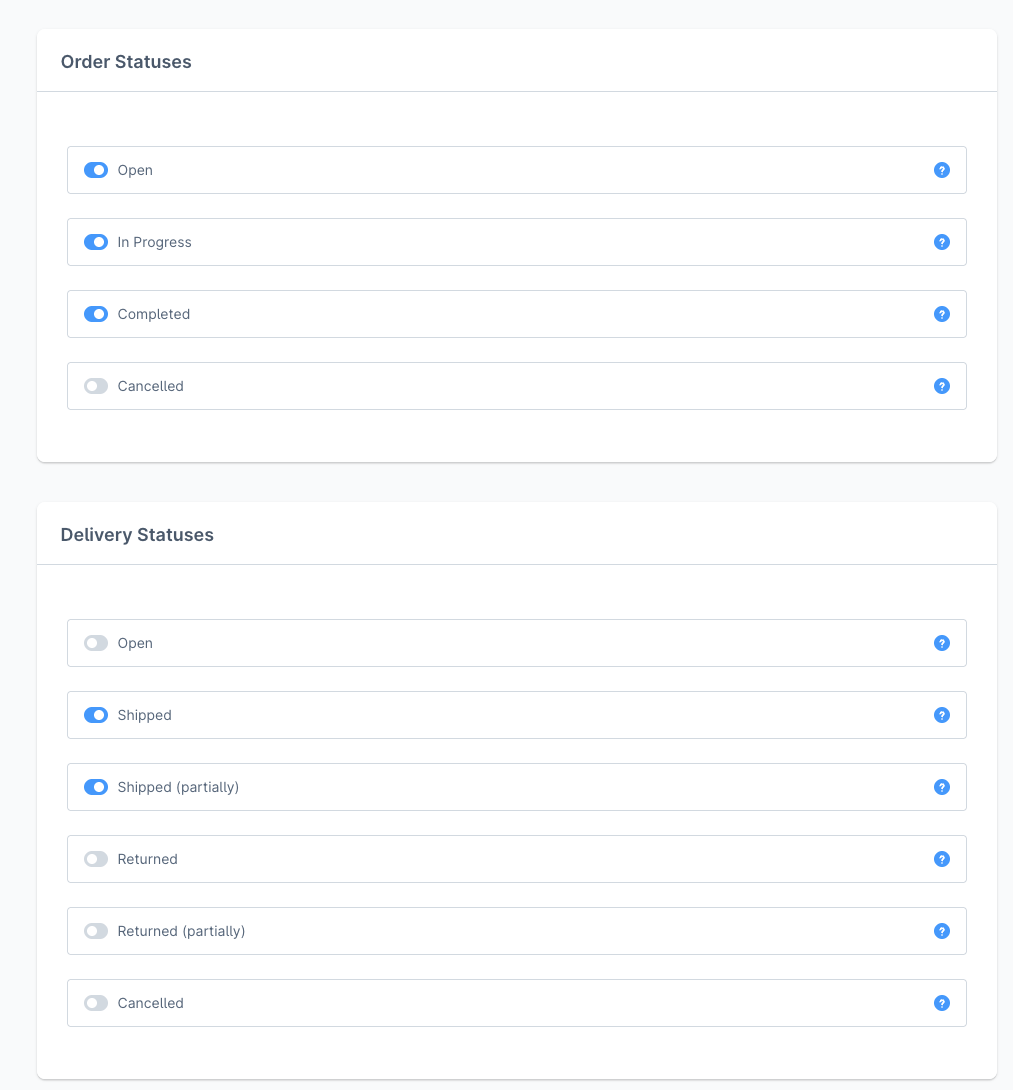
Trigger behavior#
You can select which Shopware events trigger the sending of order and shipment data to Karla.
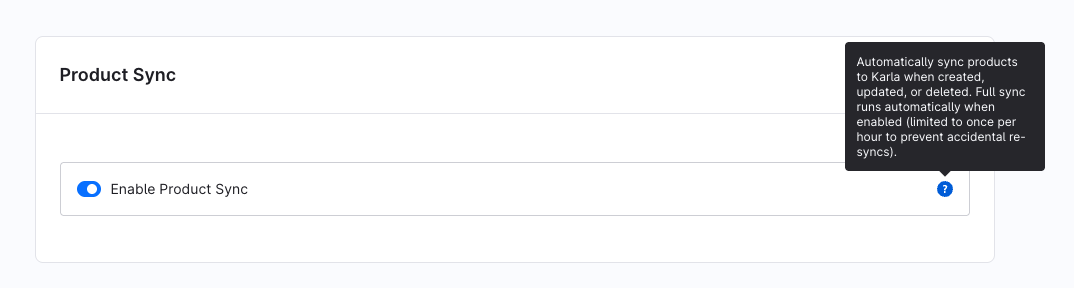
Product synchronization#
Orders automatically include product data even when product sync is disabled. However, this data is captured at order creation time and may become outdated. For example, if a product image changes after the order is placed, the tracking page may display a broken link and fall back to a placeholder image. Additionally, product information sent with orders does not include translations.
When product sync is enabled, the plugin continuously synchronizes the latest product information from your admin panel to Karla, including translations. This ensures that products displayed on tracking pages always reflect the current state of your shop.
Enabling this feature will perform an initial full sync of all products, then automatically sync any new, updated, or deleted products while the feature remains active.
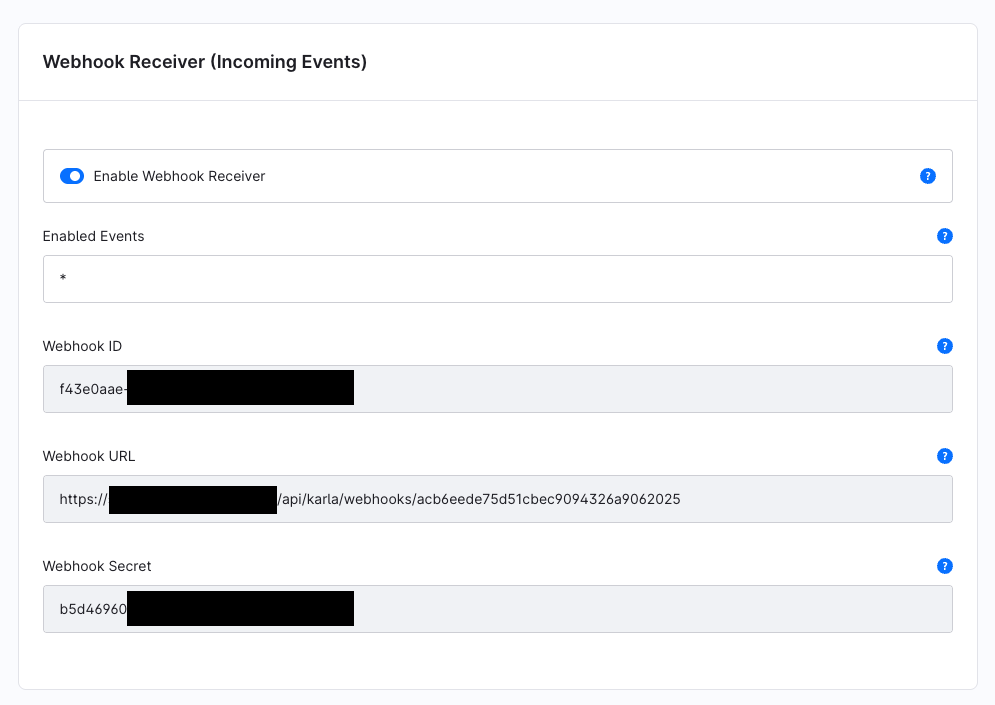
Webhook Receiver (Incoming Events)#
Enable receiving events from Karla into your Shopware instance. This will validate any incoming requests with a uniquely generated secret as described in Webhooks.
Enabled Events accepts a comma-separated event names, or * for all events. Examples: shipments/delivered,claims/created. Set before enabling webhook (changes after webhook creation will be ignored). See Events.
The Webhook ID, Webhook URL and Webhook Secret values are read only and will be shown once you save the setting with the Enable Webhook Receiver toggle activated and you refresh the page.
This setting is necessary to configure Notify
Mappings#
Use Mappings to define line item types (e.g., 'deposit'). This lets you exclude them from the order summary on the tracking page.

Multi-tenant#
For Shopware instances with multiple sales channels, this configuration links each sales channel to a specific Karla shop ID. This enables using multiple Karla shops with a single Shopware instance.
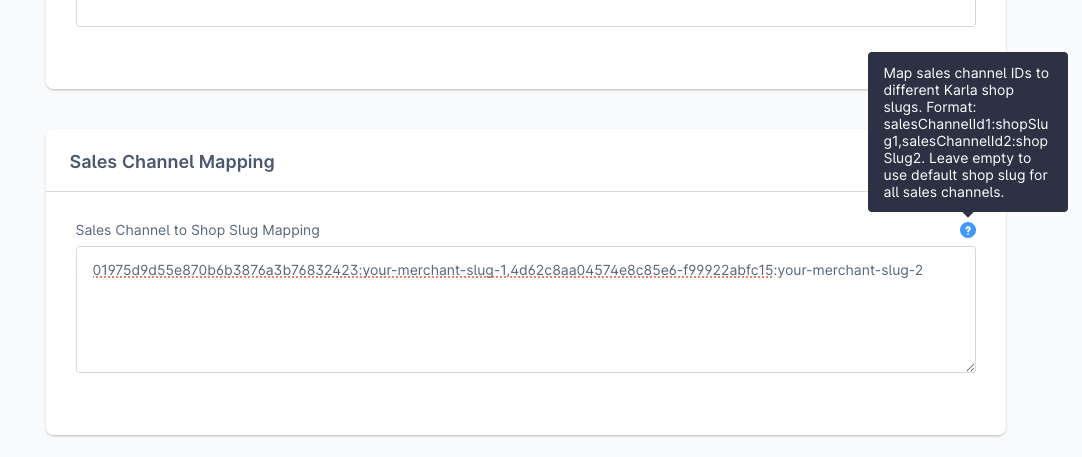
You can retrieve the version of your sales channel if you click on it in the admin panel and you check the url: for instance in https://<your-shop-domain>/admin#/sw/sales/channel/detail/98432def39fc4624b33213a56b8c944d/base, 98432def39fc4624b33213a56b8c944d is the sales channel id.
Make sure that the provided API credentials have access to all the shops defined in this setting. It is possible to have multi-shop credentials.
Upgrade the Karla extension#
If you already have the Karla plugin installed and want to get benefit from the latest plugin features, just upload the latest KarlaDelivery.zip file as described in Upload the Extension.
You will then see an option to update your currently installed extension.

After clicking update, your plugin will be automatically updated to that version with the settings you set before.