Shopify#
The Shopify integration allows Karla to retrieve order updates from your shop and display them on your customers' tracking pages (e.g., purchased products, shipping address, etc.) as well as retrieve all tracking numbers to provide corresponding tracking updates.
Install the Shopify App#
Install our Shopify App and follow the onboarding steps.
Inside the Karla app#
Open Shopify admin → Apps → Karla to reach the app. Everything merchants configure day-to-day lives in six areas:
| Area | What you do there |
|---|---|
| Home | Key metrics (orders, fulfillments, campaign attribution), a step-by-step setup guide, and example tracking pages |
| Campaigns | A read-only list of your legacy Main Promotion campaigns. New campaigns are created and managed in the Karla portal — Edit in portal on a campaign opens it there |
| Upsells | Post-purchase upsell flows and checkout upsell offers, their settings, and performance |
| Survey | Thank you survey results, CSV export, and the question builder |
| Referrals | Set up the referral program and follow referral performance, with Orders and Advocates tabs |
| Settings | Two tabs: Platform (order sync, Shopify integration, embedding options) and Attributions (campaign attribution) |
The app also includes a tracking preview for order lookup: open any order's Karla block in the Shopify admin to preview that order's live tracking page exactly as the customer sees it.
Checkout surfaces#
After the app is installed, you can enable four checkout surfaces merchants configure themselves — no custom implementation required:
| Feature | Where buyers see it | Setup guide |
|---|---|---|
| Checkout upsell | Checkout order summary, before payment (Shopify Plus only) | Checkout upsell |
| One-click upsell | Shopify post-purchase page (after payment, before Thank you) | Post-purchase upsell |
| Thank you survey | Shopify Thank you page | Thank you survey |
| Thank you promotion | Shopify Thank you page | Thank you page promotion below |
All four are configured in the Karla app and activated once in Shopify checkout settings / the checkout editor.
Thank you page promotion#
Show your active Karla promotion right on the Thank you page with the Karla Promotion block — a banner for a basic promotion, or up to two product cards (with prices and discount badges) for a product promotion.
Add the block:
- In Shopify admin, go to Settings → Checkout and click Customize.
- Switch to the Thank you page.
- Click Add block and choose Karla Promotion (under Apps).
- Position the block and click Save.
Block settings (in the checkout editor):
| Setting | What it does |
|---|---|
| Promotion type | Which Karla promotion to show — basic (banner with image, text, and button) or product (product cards) |
| Section heading | Custom heading above the promotion; leave empty to use the promotion's own title |
| Button text | Custom label for the product buttons; leave empty to use the promotion's CTA label |
Karla shows your currently active promotion of the selected type — the default-segment one when several are active. Product promotions must have a fixed product list (dynamic / AI product promotions are not used on this surface). Promotion content is localized to the buyer's checkout language; custom heading and button text are shown as-is, untranslated.
When no promotion is active, buyers see nothing — the block never renders an empty section. In the checkout editor you see a placeholder hint instead, so you can still position the block.
Every link in the block carries ref=karla-thankyou, so orders placed from
the Thank you page promotion are attributed to Karla and stay separable from
other Karla surfaces in your analytics.
Tracking page links#
You don't need to build tracking links by hand — the Karla app generates them for you. In the app, open Settings → Embedding Options to:
- Copy ready-made Store Pages links (Order Tracking and Issue Resolution) on your store's domain, with an Add to Store Navigation shortcut straight to Shopify's menu editor
- Set the Tracking Page URL used by theme widgets such as the Order Status page block
- Copy example deep links to use in email templates or share with customers
By default, the Karla app provisions a tracking page on your Shopify domain (including all market domains), that you can use right away:
If your markets use subfolder paths (e.g., /de, /de-at), include the market prefix: https://[yourdomain]/de-at/apps/karla/track. For subdomain or separate domain markets, simply use that domain as [yourdomain].
Order Tracking#
- Logged-in customers see their recent orders. Guests see the order finder.
https://[yourdomain]/apps/karla/track
- Direct link for logged-in customers:
https://[yourdomain]/apps/karla/track?orderNumber=00001
- Direct link for guests (zip code required):
https://[yourdomain]/apps/karla/track?orderNumber=00001&zipCode=10119
Issue Resolution#
- Logged-in customers see their recent orders. Guests see the order finder.
https://[yourdomain]/apps/karla/resolve
- Direct link for logged-in customers:
https://[yourdomain]/apps/karla/resolve?orderNumber=00001
- Direct link for guests (zip code required):
https://[yourdomain]/apps/karla/resolve?orderNumber=00001&zipCode=10119
00001 (order number) and 10119 (zip code) are example
values. Replace them with your customer's actual order number and zip
code to create a deep link to any specific order. Zip code is only required if the customer is not logged in.
Shipment tracking blocks#
Two ready-made blocks surface Karla tracking with no custom code:
- Shipment Tracking (customer accounts) — an app block for the Order status page in customer accounts. It shows a short tracking section with a Track your package button that takes the customer to their order's tracking page. Add it in the Checkout & Accounts editor — in the Karla app, Settings → Embedding Options → Order Status Page takes you there. The section title, description, and button text are editable in the block settings (custom text is shown as-is, untranslated).
- Karla block (order admin) — every order's details page in Shopify admin gets a Karla block showing the shipment's carrier, status, ETA, and recent activity, with a link to the customer's tracking page. You can also add shipment events manually from here — useful for testing, or for shipments Karla doesn't track automatically.
Advanced: Setting up your own Tracking Page template#
You can add the Karla tracking widget to any Shopify template of your choice.
Adding the widget to your default page template will override all pages that use that template (info pages, help center, guides, etc.). Always use a dedicated template.
Step 1: Add the tracking widget to a theme (pick one method)#
Our app includes a ready-made Tracking Page block that you can add via the theme editor:
- Go to Online Store → Themes → Customize
- In the top navigation, select Pages → choose your tracking page
- Click Add section and look for the Tracking Page block (under "Apps")
- Configure language and starting view in the block settings
- Remove the default content section if you want the tracking widget to be the only content
- Click Save
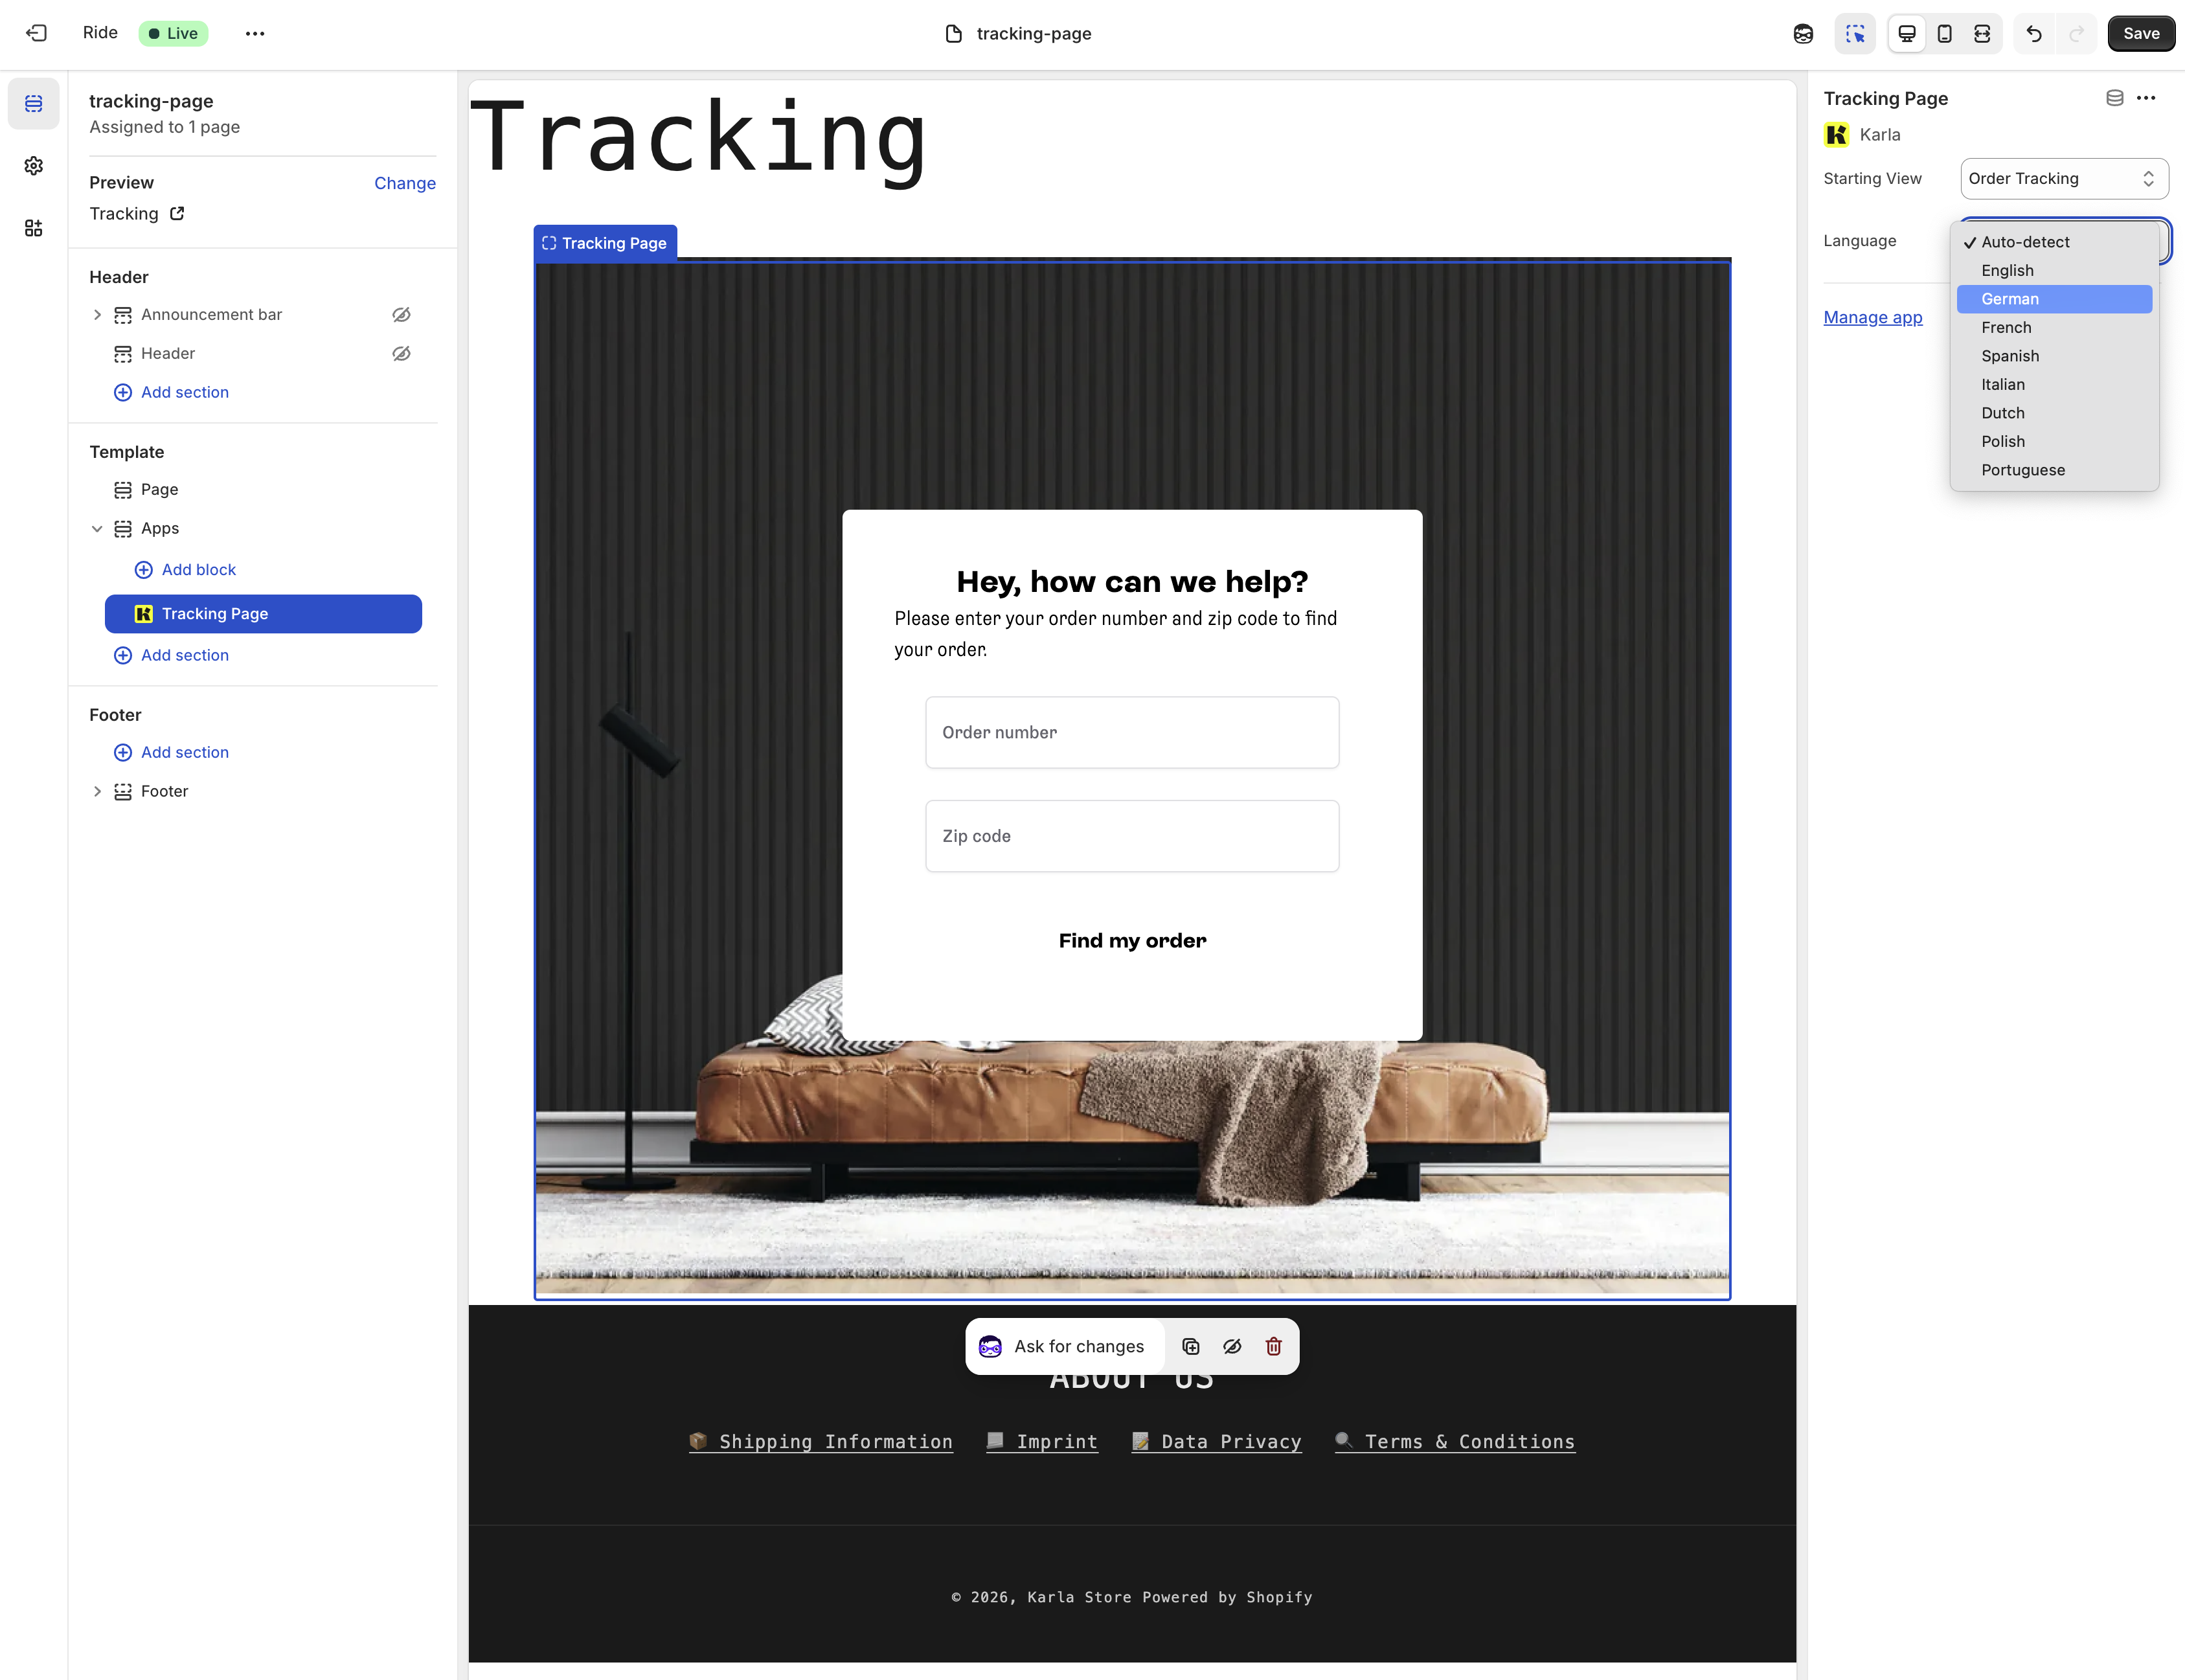
This approach automatically inherits your theme's fonts and colors, supports logged-in customers (they will see a very simple list of their latest orders to pick if they are logged in and no orderNumber query parameter was given), and requires no code.
Step 2: Create a page based on the template#
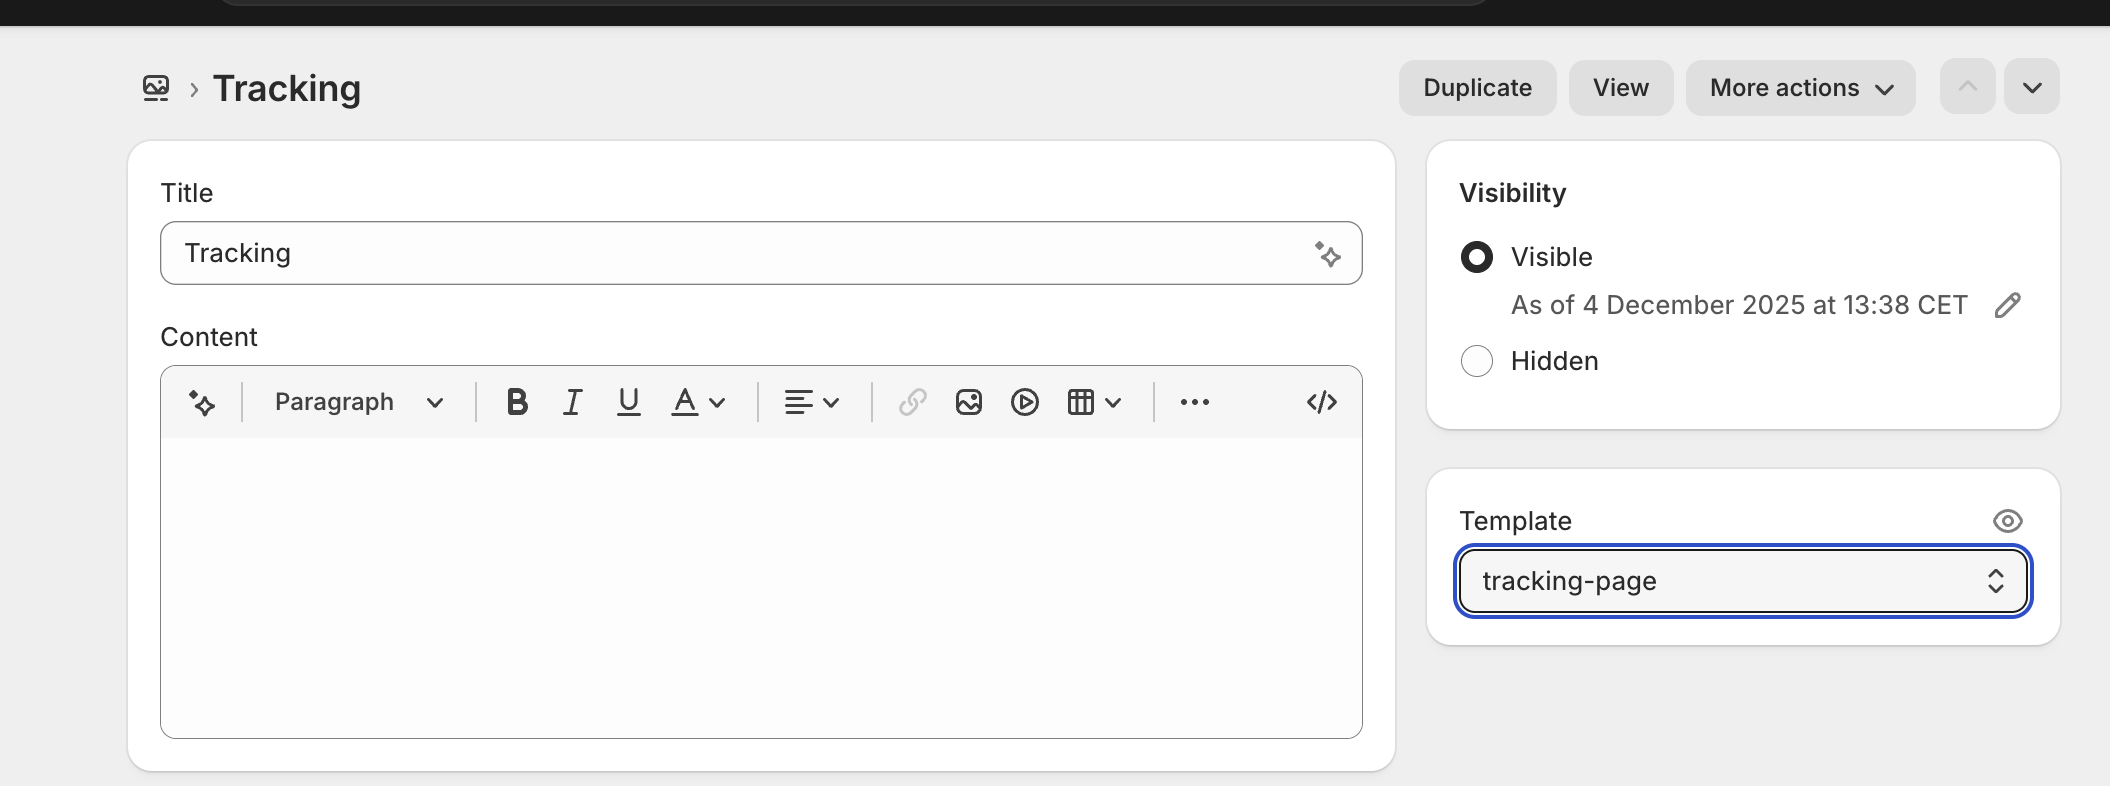
- In your Shopify admin, go to Online Store → Pages
- Click Add page
- Set the title (e.g., "Track your order")
- Select the template
- Publish the page
Advanced: Campaign attribution#
Our Shopify app also allows you to track which orders come from your Karla campaigns. For a complete overview of attribution methods across all platforms, see the Campaign Attribution Overview.
Method 1: Shopify app#
All call-to-action links in portal campaigns automatically carry Karla's attribution parameters — ref=karla, karla_source, karla_medium, and karla_campaign (plus originating-order identifiers on product promotions). No link configuration is needed.
The Karla app's attribution pixel — enabled under Settings → Attributions → Campaign Attribution in the app — captures these parameters when the customer lands in your store and sends them to Karla when the checkout completes.
For the full parameter reference, consent options, and how to verify the chain end-to-end, see Campaign attribution.
Method 2: Discount codes#
Simply add a discount code to your campaign in the Karla portal. Orders using this discount will be automatically attributed to the campaign.
Verifying orders in Shopify:
Navigate to Orders → Filter by Discount code to see all orders that used your campaign discount.
For complete details on discount code attribution, best practices, and limitations, see Discount code attribution.
Customer Segments via Order Tags#
Karla automatically reads tags from your Shopify orders and customers and turns each one into a segment you can target in campaigns, triggers, and A/B tests. No setup required on the Karla side — just tag your orders (or customers) in Shopify and Karla picks them up.
How it works#
- Each tag on the Shopify order — and each tag on its customer — becomes a segment in Karla with the prefix
Shopify.tag.followed by the exact tag name. - Karla re-reads tags every time an order is created or updated in Shopify, so tags added later are picked up automatically.
- Multiple tags on one order produce multiple segments.
Examples:
| Order tag | Karla segment |
|---|---|
vip | Shopify.tag.vip |
bought-starter | Shopify.tag.bought-starter |
market-de | Shopify.tag.market-de |
Driving segments with Shopify Flow#
Order tags become powerful when combined with Shopify Flow. Flow can stamp an order with a tag based on anything Shopify knows — customer attributes, line items, totals, location, Shopify Customer Segments, even data from third-party apps. Karla then turns those tags into segments.
Example — VIP customers see a VIP banner:
In Shopify Admin → Apps → Shopify Flow → Create workflow:
- Trigger:
Order created - Condition: customer has tag
vip - Action:
Add order tags→vip
When a VIP customer places an order, Shopify stamps it with vip, Karla receives the webhook, and a campaign targeting segment Shopify.tag.vip runs on that customer's tracking page.
Example — cross-sell on a specific product:
- Trigger:
Order created - Condition: any line item matches the "Starter Kit" product (or SKU)
- Action:
Add order tags→bought-starter
Karla emits segment Shopify.tag.bought-starter; a product campaign recommending related items targets that segment.
Common Flow patterns#
| Goal | Flow condition | Order tag | Karla segment |
|---|---|---|---|
| VIP banner | customer has tag vip | vip | Shopify.tag.vip |
| First-time buyer welcome | customer's number of orders equals 1 | first-time | Shopify.tag.first-time |
| Loyalty offer | customer's number of orders is 3 or more | loyal | Shopify.tag.loyal |
| Free-shipping VIP | order total ≥ 100 | high-value | Shopify.tag.high-value |
| German-market campaign | shipping country is DE | market-de | Shopify.tag.market-de |
| Cross-sell on specific product | any line item matches a target product or SKU | bought-starter | Shopify.tag.bought-starter |
| Shopify Customer Segment membership | trigger Customer joined segment → tag the customer → on order, mirror the customer tag into an order tag | seg-vip | Shopify.tag.seg-vip |
Things to know#
- Tags are case-sensitive —
VIPandvipproduce different segments. Pick one convention and stick to it. - Tags cannot contain commas — Shopify uses commas as the separator. Use hyphens or underscores instead (e.g.,
wholesale-b2b). - Spaces inside a tag are preserved —
"first time buyer"becomesShopify.tag.first time buyer. Hyphens read more cleanly in segment lists. - Empty tags are ignored, and surrounding whitespace is trimmed.
- Once an order is fulfilled, changing its tags won't switch the campaign that shipment shows. Campaign assignment is locked at fulfillment. See How segmentation works.
Karla reads customer tags and order tags identically — both become Shopify.tag.* segments. For order-specific targeting, prefer order tags: Shopify Flow can read any customer attribute and write it as an order tag, so each order carries exactly the segments you want.
📚 Shopify docs:
Advanced: Custom Properties#
Add custom properties to your Shopify orders to enhance your customers' delivery experience with Karla.
Understanding Scopes#
Karla reads custom data from Shopify order attributes (also called note
attributes), always prefixed with _karla_:
- Set them with Shopify
attributes— cart attributes become order attributes at checkout - They apply to the entire order; per-product data (like estimated ship dates) is keyed by variant ID inside the attribute value
Order Attributes#
These attributes will appear in the Additional details section of your order admin panel.
Estimated ship dates#
Specify when each product is expected to ship using the
_karla_estimated_ship_dates order attribute. Its value is a JSON object
keyed by the numeric variant ID of the line item:
{ "44123456789": { "start": "2025-10-23", "end": "2025-10-30" } }Providing both start and end creates a shipping window (e.g., "Ships between Oct 23 and Oct 30"). Providing only start displays a single estimated date. An end earlier than start is discarded.
- Date formats accepted: any ISO 8601 date string (preferred), or common date strings like
23.10.2025or10/23/2025 - Scope: Per product variant, set once on the order
Order attribution variables#
The Karla Shopify app reads these cart attributes when an order is placed and
forwards them to the order's order_analytics payload. You can set them
yourself (via cart AJAX or theme liquid) to own the full attribution logic.
See Campaign attribution for the
complete flow.
These variables are:
_karla_campaign: Campaign identifier_karla_captured_at: Timestamp when the attribution was first captured_karla_landing_path: Path on your shop where the customer landed_karla_landing_url: Full URL where the customer landed_karla_medium: Marketing medium (e.g., email, banner, push notification)_karla_referrer: HTTP referrer URL_karla_source: Traffic source identifier (e.g., trackpages, karla-lounge)
Complete Implementation Examples#
Example 1: Setting Estimated Ship Dates (AJAX)#
Set the estimated ship dates as a cart attribute — Shopify turns cart attributes into order attributes at checkout:
<script>
  fetch('/cart/update.js', {
    method: 'POST',
    headers: { 'Content-Type': 'application/json' },
    body: JSON.stringify({
      attributes: {
        '_karla_estimated_ship_dates': JSON.stringify({
          '{{ product.variants.first.id }}': {
            start: '2025-10-23',
            end: '2025-10-30'
          }
        })
      }
    })
  });
</script>
Use the numeric variant ID of each line item as the key, and include one entry per product that needs a ship date.
Example 2: Adding Order Attribute (Cart Page)#
There are two methods depending on your theme type:
Method A: Traditional Form (Older Themes)#
If your theme uses traditional cart forms (typically older themes or custom implementations):
<form action="{{ routes.cart_url }}" method="post" ...>
  <!-- Your cart items display here -->

  <!-- Order attribute: attribution source, add before the </form> tag -->
  <input type="hidden" name="attributes[_karla_source]" value="email">
</form>
Method B: AJAX Cart (Modern Themes)#
Most modern Shopify themes (Dawn, Refresh, etc.) use AJAX for cart operations. For these themes, add this JavaScript to your theme file (e.g., theme.liquid), before the closing </body> tag:
<script>
  fetch('/cart/update.js', {
    method: 'POST',
    headers: { 'Content-Type': 'application/json' },
    body: JSON.stringify({
      attributes: { '_karla_source': 'email' }
    })
  });
</script>
Replace the example values with the attribution data your own logic captures.
Troubleshooting#
Attributes not showing?
- Check spelling: must be exactly the documented key name (lowercase, with the leading underscore)
- Ensure hidden inputs are inside your
<form>tag - Use
attributes[...]— line itemproperties[...]are not read by Karla - For modern themes: If hidden inputs don't work, use the AJAX method (Method B) instead
Order attributes still empty in cart.js?
- Your theme likely uses AJAX cart → Switch from Method A (hidden input) to Method B (JavaScript)
- Check browser console (F12) for errors
- Make sure the script runs after items are added to cart
Attributes visible to customers?
- Make sure the attribute name starts with an underscore
Dates not working?
- The
_karla_estimated_ship_datesvalue must be valid JSON keyed by variant ID — invalid JSON is ignored - Use format:
YYYY-MM-DD(e.g.,2025-10-23) - Or:
DD.MM.YYYY(e.g.,23.10.2025) - Or:
MM/DD/YYYY(e.g.,10/23/2025)
The ideal format is an ISO 8601 date string, but we have extra parsing to accommodate non-standard dates (best-effort).
Quick Reference#
Order#
| Property | Type | Example |
|---|---|---|
_karla_campaign | String | 8c0b2fcf-c0a0-46f7-8383-1cac748f35c0 |
_karla_captured_at | String | 2025-10-23T14:30:00Z |
_karla_estimated_ship_dates | JSON string | {"44123456789": {"start": "2025-10-23", "end": "2025-10-30"}} |
_karla_landing_path | String | /products/shoes |
_karla_landing_url | String | https://shop.myshopify.com/products/test?karla_source=email |
_karla_medium | String | social |
_karla_referrer | String | https://google.com |
_karla_source | String | trackpages |
Notify#
Karla surfaces shipment updates inside your Shopify admin in two distinct ways. Most shops combine both — native Shopify Notifications for the baseline experience, and Karla-powered Shopify Flow actions for anything richer.
1. Shopify Notifications (native)#
Karla pushes shipment events to each order's fulfillment endpoint so they appear natively in Shopify — on the order timeline, on the Order status page, and as triggers for Shopify's built-in email notifications.
Because this uses Shopify's native fulfillment model, the vocabulary is limited to what Shopify understands. Karla maps each shipment to one of the following fulfillment event groups:
ATTEMPTED_DELIVERYDELAYEDDELIVEREDFAILUREIN_TRANSITOUT_FOR_DELIVERYREADY_FOR_PICKUP
This is the right choice if you want Shopify's own email notifications and Order Status page to reflect Karla's shipment tracking automatically — no flow configuration required.
2. Karla notifications via Shopify Flow#
For everything beyond Shopify's native fulfillment vocabulary, Karla ships Shopify Flow triggers that give you access to the full Karla event catalog — not just the subset Shopify can represent natively. This includes granular events like delivery failures and second attempts, address issues, carrier delays and carrier changes, damaged or returned shipments, and issue events from the tracking page.
How it works:
- Install the Karla Shopify app (covered at the top of this page).
- In the app, open Settings → Platform and turn on Flow triggers under Shopify Integration. If Karla paused the connection after repeated errors, the switch shows as off; turning it on again reactivates it.
- Open Shopify admin → Shopify Flow and create a new workflow.
- Pick a Karla trigger as the workflow's starting point — every Karla notification event is available as a trigger.
- Branch the flow however you like: send emails, update tags, create tasks, call webhooks, trigger other integrations. Karla also provides one Flow action — Send Karla email — to send a Karla email template as a workflow step.
If you need a notification that isn't one of the seven native Shopify fulfillment states, use Shopify Flow. That's the only way to react to the full Karla event catalog inside Shopify.